Gluten free custard tart with berry compote

This recipe is E A S Y ! On a pantry stock up spree I bought some gluten free sweet pastry shells from gfpantry.com. They looked fun. As soon as the order arrived I just had to create something, anything we had in the kitchen would do. Some eggs, almond milk and berries. . .

The berry compote recipe is from thehiddenveggies.com. I added some extra brown sugar to it for a bit of extra drool. This with my go to healthy custard recipe from traditionalcookingschool.com is literally the easiest and the best healthy custard recipe I have come across. I added 2 tsp extra gelatin to make sure the custard sets well.

Once you have prepared both the custard and the compote, you must cool to room temperature prior to filling so that the pastry does not go soggy.

I used an organic gelatin powder from Changing Habits. It is full of natural amino acids and protein, great for your gut health and tissue repair. There is so much you can make with gelatin like gummie bears, jellies, thicken sauces, panna cotta and cheese cake!

Makes 24 small tarts , there will be extra custard!

Custard:

Ingredients:

3 cups unsweetened almond milk

4 egg yolks

1/4 cup maple syrup or honey

1/3 cup arrowroot powder or cornflour

1 tbs butter

4 teaspoons gelatin powder

1 tsp vanilla extract

1/4 tsp salt

Instructions:

Whisk together arrowroot and gelatin in a small bowl.

Into a medium saucepan, pour milk, egg yolks, maple syrup, and sea salt.

Sprinkle the arrowroot mixture over its surface, and whisk again to combine.

Cook over medium heat for about 10 minutes, stirring CONSTANTLY until the pudding begins to thicken. It will start to steam first, which is your sign that the custard is almost done.

Once thickened, remove immediately from the heat.

Add butter and vanilla and continue to stir until mixed.

Chill to room temperature.

Berry compote

Ingredients:

1 1/2 cup berries of choice (fresh or frozen)

3 tbsp sugar or sweetener of choice

1/3 cup cold water

1 tbsp cornstarch (or arrowroot powder)

1/2 tsp lemon juice

Method

Add berries to a small saucepan and sprinkle with sugar and lemon juice.

Heat the berries on medium-low until they start to release their juices.

In a separate bowl, mix corn starch (or arrowroot) and cold water and then pour it into the berries and stir well. 

Stir constantly and continue to heat the berry sauce until after it has boiled for about 30 seconds.

Remove from heat and allow to cool slightly.
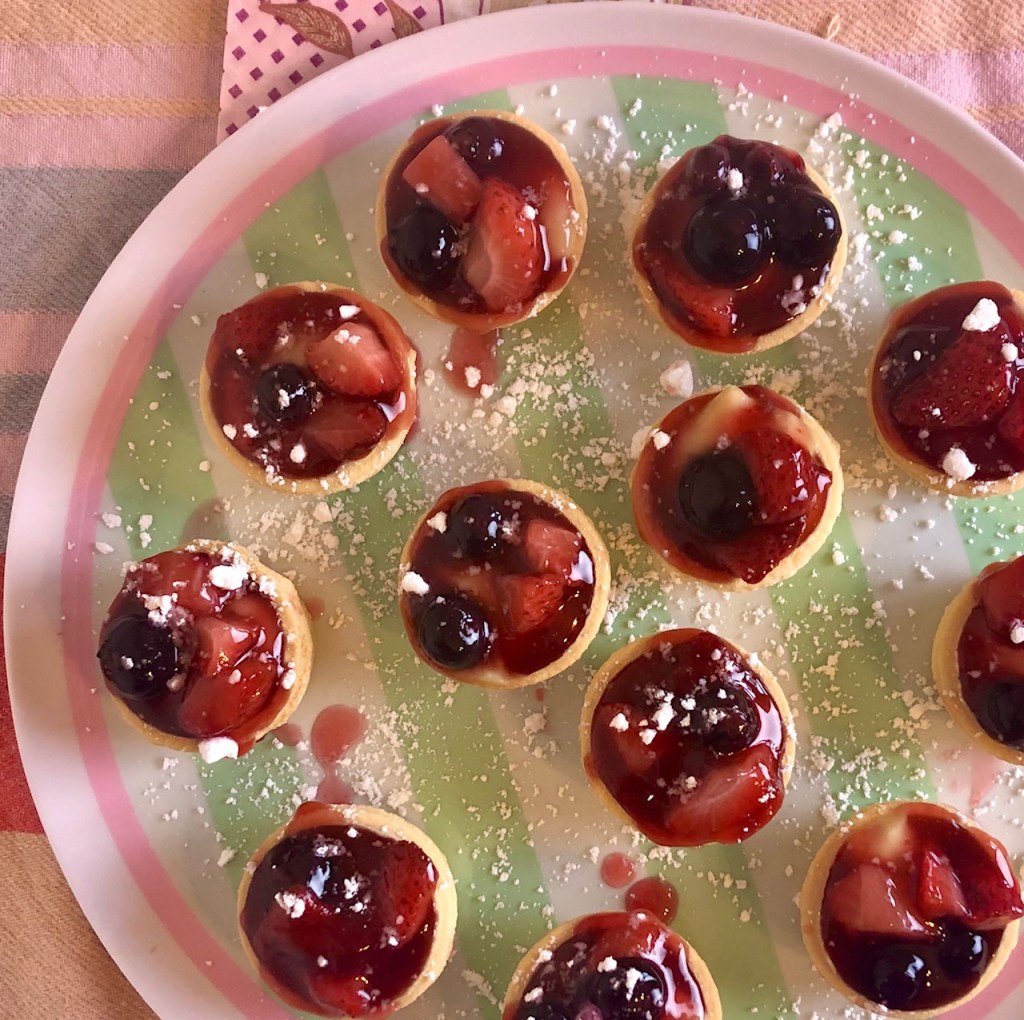
Assembly:

Place pastry cups onto a platter

Spoon custard into a piping bag and pipe to fill ¾ of the cup.

Spoon the berry compote over the top. Chill for an hour to set and then dust with icing sugar if desired.

Advertisement

My First Crap Cake

*With beginner cake decorator tips!

This amazing white chocolate cake is both way out of your baking league, and delicious -assuming you are also a beginner cake decorator. Otherwise you wouldn’t be reading this unless you have such low self esteem that the only way you can survive this life is through feeding off others disastrous attempts and mishaps and just plain untalentedness. It’s ok, we all do it.

You can find the recipe for this absolutely scrumptious cake here: https://livforcake.com/white-chocolate-cake/ This site has a heeaapp of mouth watering cakes to choose from too!

As you can see from this photo, I read a beginners food photography blog prior to preparing the cake.

I told everyone I was making this heavenly white chocolate cake, an extravagant one that’s three storeys high and decorated. I invited them all to save a spot in their treat bank for it this week and await this amazing cake sensation.

**beginner cake decorating tip: Beware of ‘the slope’ look and layer by evenly distributing weight by evenly cooked cakes and evenly spread frosting

The heavenly whipped merengue frosting is full of white chocolate and a ton of butter, and so is the cake. It surprisingly still kept its light merengue texture and when it melted on the tongue my whole central nervous system goes ‘mmmm … relaaaaax….I’m hooome” while euphoric memories of warm fires, cuddles and puppy dogs flood into my mind.

This merengue frosting was to be used in between each layer of the cake, for the smooth outer layer of the cake, and then for the ultimate finish- my creative input, the intricate piped flower craft on the top of the cake. At this point I am a bit disappointed about my not so smooth finish on the outer layer, but feeling hopeful.

I also threw in a tub of caramilk cream cheese in between the first layers of the cake for the caramel lovers.

**Beginner cake decorator tip: de-crumb cake prior to applying the frosting. Also look up the term  ‘de-crumb’ in cooking methodology.

Now this next step was going to fix my uneven layer… but something just doesn’t look right. White chocolate ganache phleghmnache. Looks like a lumpy goosebumps book cover. It was just not at all what I had been dreaming about over the past week. But I’m not going to let that bum me out I thought.. I’m taking to the sky and with my fantastical imagination and I will make a masterpiece!

Well, now I’m starting to regret telling my boyfriends mum all about this new hobby … and on borrowing her Russian piping tips excitedly telling her I would send photos and bring her some.

When the Russian piping flowers didn’t work my heart sank. They came out in big blue boogie monster globs. I am wondering, should I have followed the recipes directions instead of making this creative disaster? It was crap. This cake was now getting the official crap label. Those dark chocolate layers in there are actually burnt cake. That parmesan cheese around the edges are white chocolate swirls. *Sad face*

At this time my boyfriend had to interfere with some motivational talk all like “it looks goooood” and “the cake decorating craft takes practice, you’ll get better”

Well, boyfriend, if I had a child who was a boy and I was sexist, maybe it would be ok for his 2nd birthday with a previously purchased little blue Choo Choo train on top.

It tasted sensational.

No one received a gift or a photo.

  • **beginner baker tip:
  • – don’t tell anyone about your new hobby yet.
  • – my boyfriends mum recommends completely setting the icing overnight before decorating
  • – I believe in you and a better world with beautiful cakes for sharing.

Well, there’s a lot to learn from cooking fails. I think I will try it again someday and learn from my mistakes.

Please tell me about your wonderful cake fails and I wonder, did you still serve it up? How did it taste? Any tips to share that you learned from it?

Love,

Rosie

The best trail mix

I love our trips to the local whole foods shop. Especially when it’s time to make a trail mix. This one was created by choosing what they had in store, for an easy shop and chop snack. Yep that is a thing, the shop and chop.

According to my dude, this is the best trail mix ever. I almost have to keep tabs on how much he’s eating so poor me dont miss out! We whip it up about once a month now on our rotation of snack attacks.

We need dietary diversity to nourish the body and its senses. The multitudes of nutrients and flavours give us life in many ways. It really is incredible when you think about the chemistry between us humans and what we eat.

So, let yourself indulge in these ingredients. .

Firstly I’m going to start with the star, the carob coated banana is the best bit. Carob is sweet and doesn’t need sugar, though most brands add it anyway. It’s a great alternative to chocolate and caffeine free!… for those who dig that kind of thing? I’ll stick to eating the carob as well as the chocolate thank you.

The dried banana tastes slightly caramelised and is a magnificent match with carob. It’s like the treat part of the mix that always bloody disappears first. We chop these into 1 CM pieces.

Pumpkin seeds or pepitas, these big green ones are grown in Australia and pesticide free. I notice a big difference in flavour from the supermarket ones.

Organic Mixed raw nuts simple as that. Packed full of goodies they are. Magnesium, protein, folate, good fats, brain food. Keep you full. Don’t eat too many , an overdose may induce a food coma. *lifts one eyebrow* Seriously.

And lastly the second star to the show is the dried pear. Decadent, soft, sweet and juicy. Just so delicious.

This healthy treat just gets me through the day. Especially when my body and brain are working hard. Find the recipe below!

I’d love to hear from you, what are your easy go-to snack attacks?

Love, Rosie

Ingredients:

1 c Carob coated banana cut into 1 cm slices

1/2 c pumpkin seeds

2-3 c mixed raw nuts

3/4 c dried pear cut into 1 CM chunks

Method:

Throw it all into a huge bowl

Mix with spoon or hands.

Store in airtight container or jar.